Reviewed on 2026-09-05.

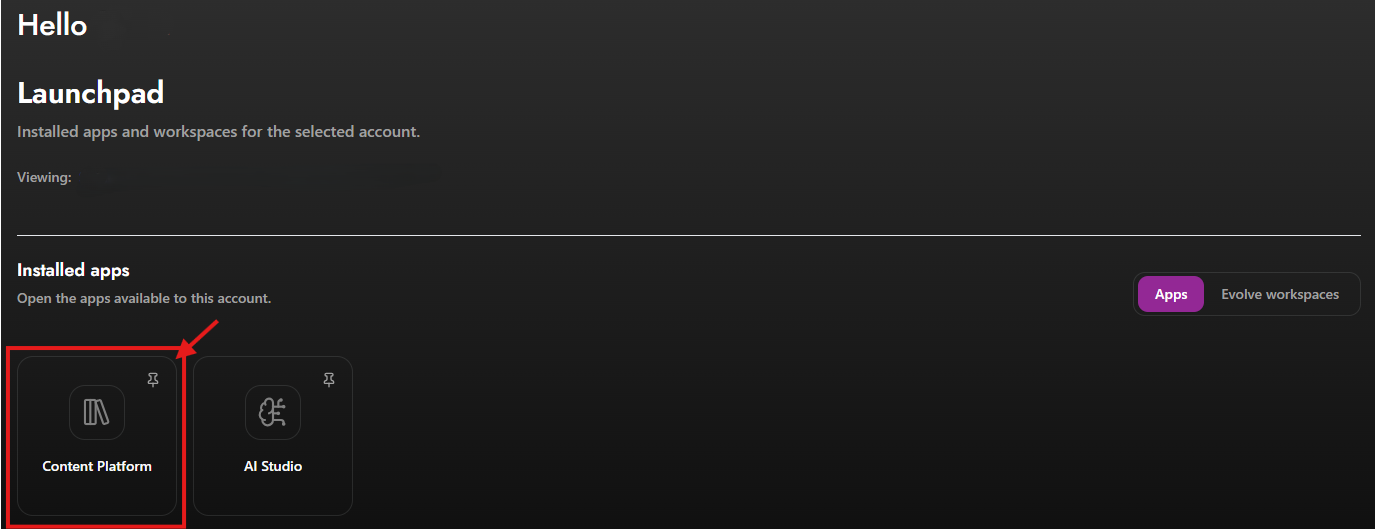
Open Drive application.
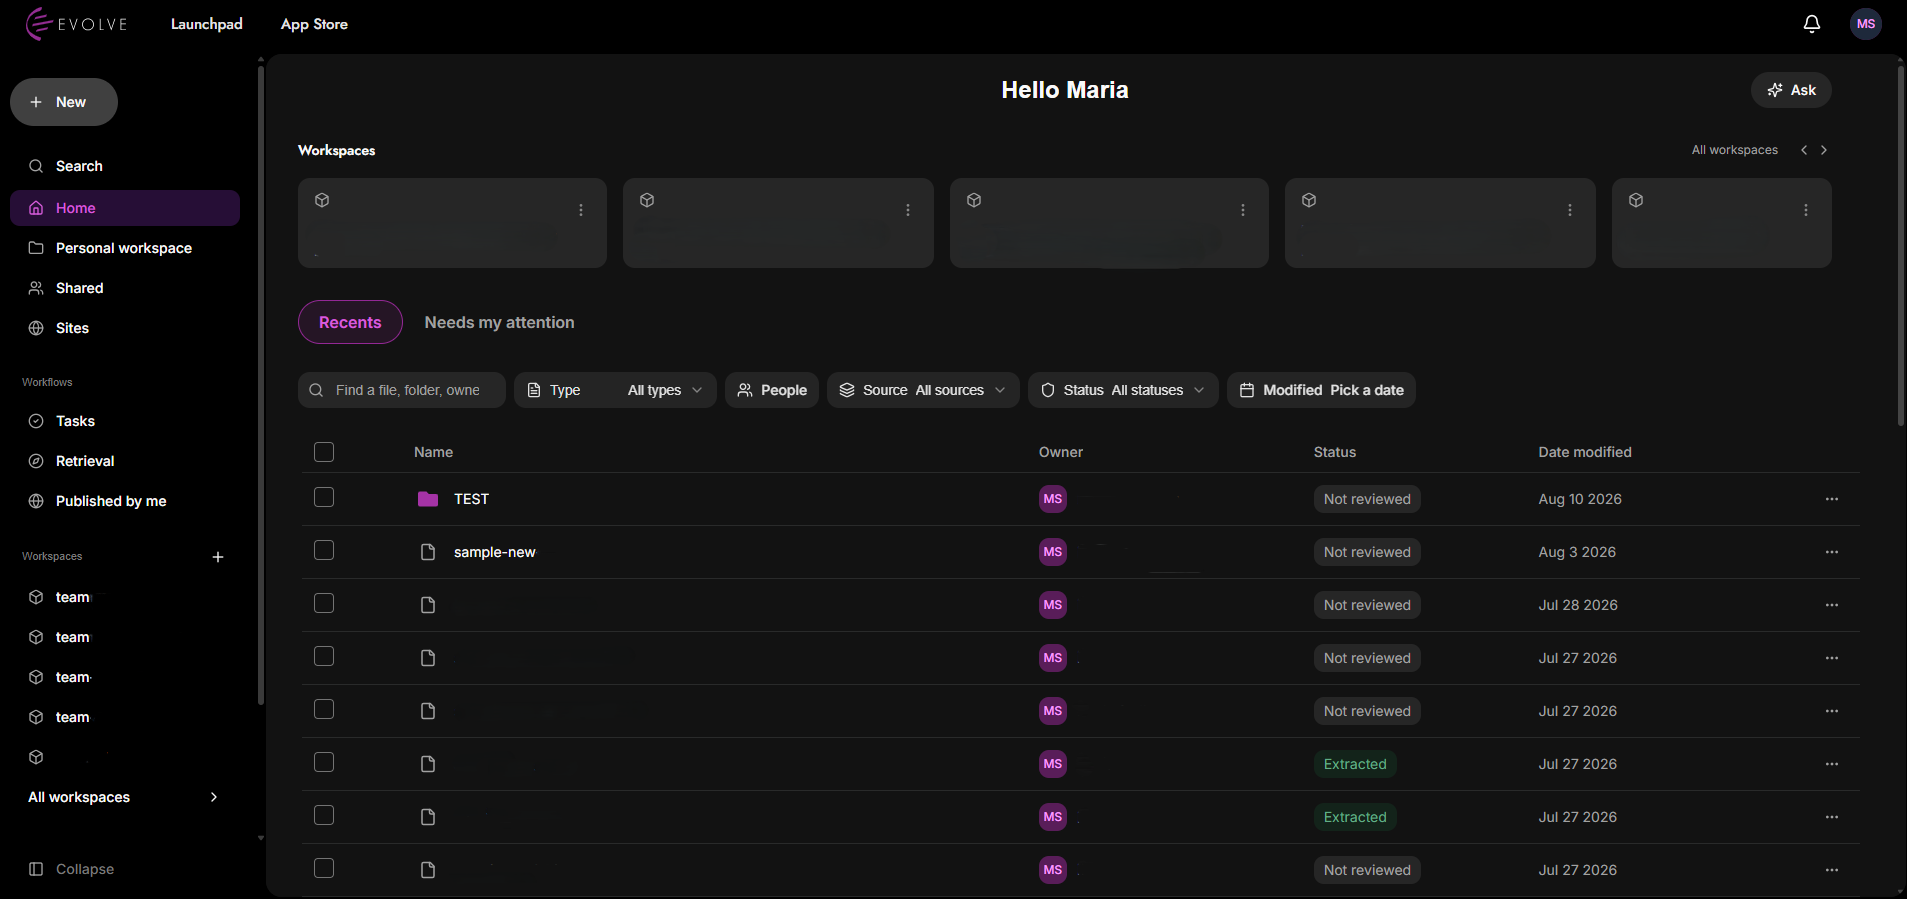

The left-hand menu provides access to your content and shared areas:
Search
Home (currently active — highlighted in purple)
My Drive
Shared
Sites
Tools related to managing and processing content:
Tasks
Retrieval
Published by me
Provides quick access to your available managed folders:
Recently accessed managed folders are displayed directly in the menu
Select All managed folders to view the complete list
Use the + icon to create a new managed folder
Additional platform features and resources:
Archive
Secure Data Intake
Documentation
Open guide
At the very bottom:
Collapse the sidebar button with an accompanying icon for minimizing the menu.
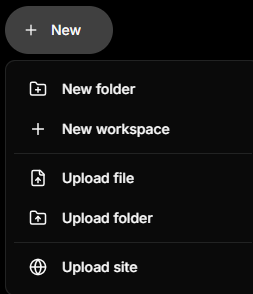
The New button provides quick access to options for creating and uploading content:
New folder — create a new folder
New managed folder — create a new managed folder
Upload file — upload an individual file
Upload folder — upload an entire folder and its contents
Upload site — upload a site
Click the New button and select New folder from the menu.
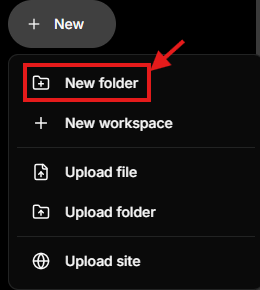
The following window will appear:
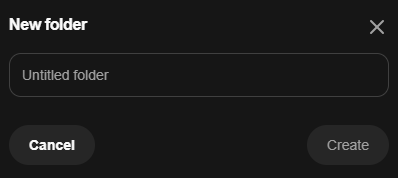
The New folder window allows you to create a folder in the current location:
Enter the desired folder name in the provided field.
Click Create to create the new folder.
Select Cancel to close the window without creating the folder.
Click the New button and select New managed folder from the menu.
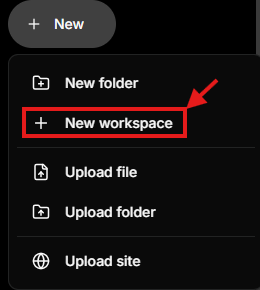
The following window will appear:
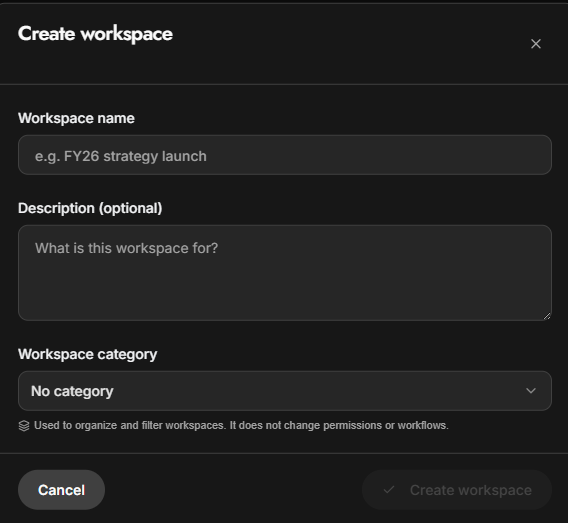
Title: an empty text input with the placeholder “e.g. FY26 Strategy launch”
Description (optional) — add a brief description explaining the purpose of the managed folder
Managed folder category — select a category to help organize and filter your managed folders
At the bottom, there is a divider line and two action buttons:
Cancel, shown as an outlined button
Create managed folder, shown (as inactive because nothing is selected)
Click the New button and select Upload file from the menu.
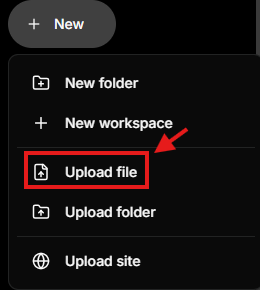
The following window will appear:
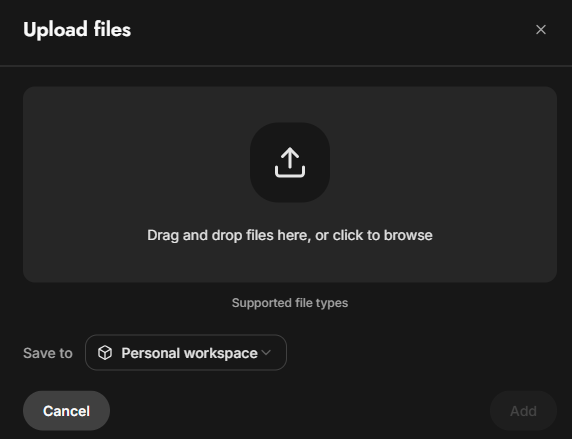
The Upload files window allows you to select and upload files to your preferred managed folder:
Drag and drop files directly into the upload area, or click browse to select files from your device.
Select Supported file types to view the file formats that can be uploaded.
Use the Save to dropdown to choose the managed folder where the files will be saved.
Once the files have been selected, click Add to complete the upload.
Select Cancel to close the window without uploading any files.
Click the New button and select Upload folder from the menu.
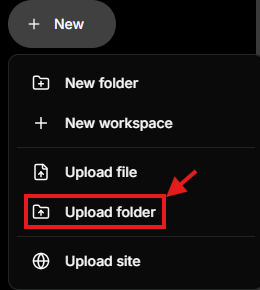
The following window will appear:
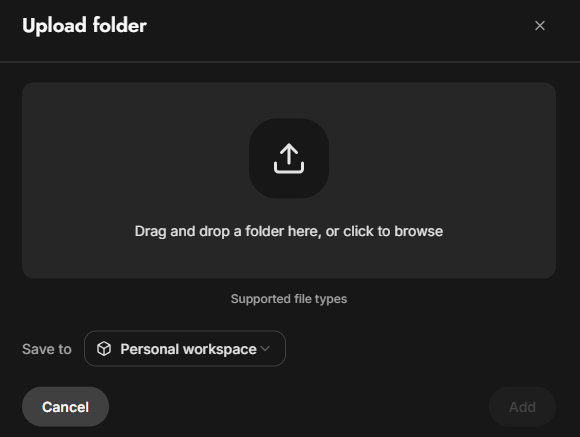
The Upload folder window allows you to upload an entire folder and its contents:
Drag and drop a folder into the upload area, or click browse to select a folder from your device.
Select Supported file types to view the file formats that can be uploaded.
Use the Save to dropdown to choose where the folder will be saved.
Once a folder has been selected, click Add to begin the upload.
Select Cancel to close the window without uploading the folder.
Issue | What to do |
The file does not upload | Check file size and file type |
Upload is slow | Large files may take longer, especially files over 100 MB |
Upload failed | Try uploading the file again |
Wrong destination selected | Cancel or finish, then re-upload to the correct managed folder if needed |
The folder is not selectable | Confirm your browser supports folder upload |
Click the New button and select Upload site from the menu.
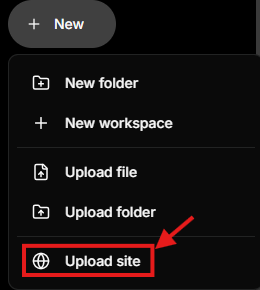
The following window will appear:
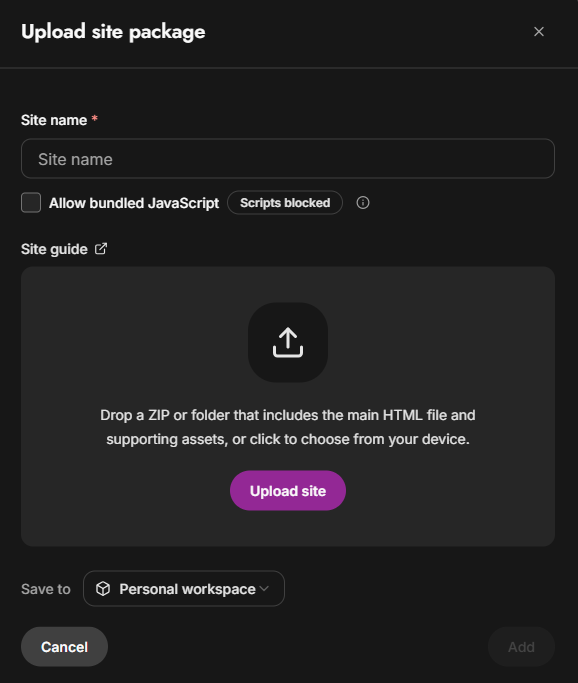
To upload a site:
The Upload site package window allows you to upload and configure a site:
Site name - Enter a name for the site
Allow bundled JavaScript — enable this option if the uploaded site requires bundled JavaScript.
Site guide "How to Use the Site Skill to Create Evolve Sites"— provides additional guidance for preparing and uploading a site package.
Upload site — upload a ZIP file or folder containing the main HTML file and its supporting assets, either by dragging and dropping it into the upload area or selecting it from your device.
Save to — choose the managed folder where the site will be saved.
Add — complete the process once the required information and site package have been provided.
Cancel — close the window without uploading the site.
How to open a file: please use this guide here.