Please begin by following this Link, which will direct you to the sign-in page for Evolve.
If you're unsure how to log in, follow this guide here.
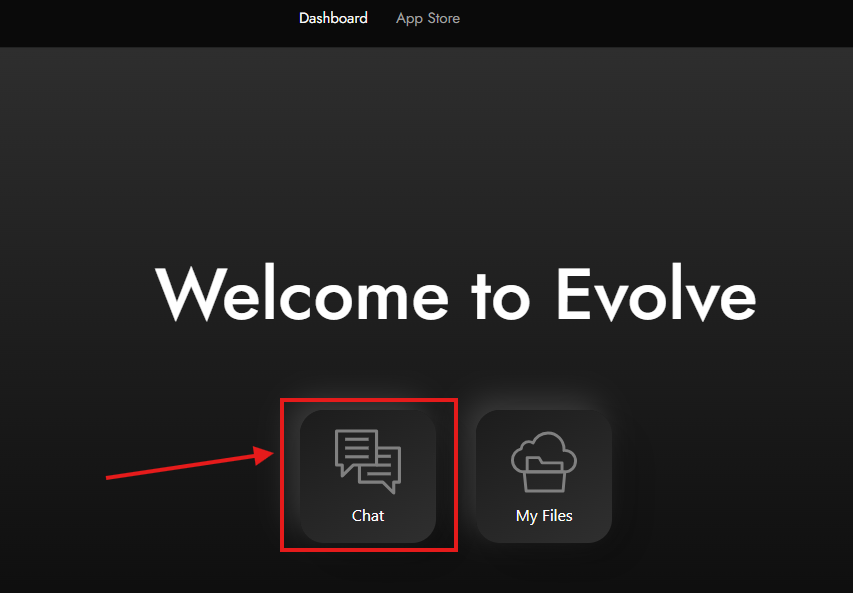
After logging in, navigate to your dashboard. Click on "Chat." If you haven't installed AI Studio yet, you can do so from the App Store.
For guidance on installing apps, refer to this guide.
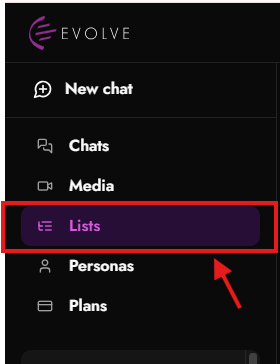
From the AI Studio main screen, navigate to the left sidebar. Click on the "Lists" option in the sidebar to open the Lists section.
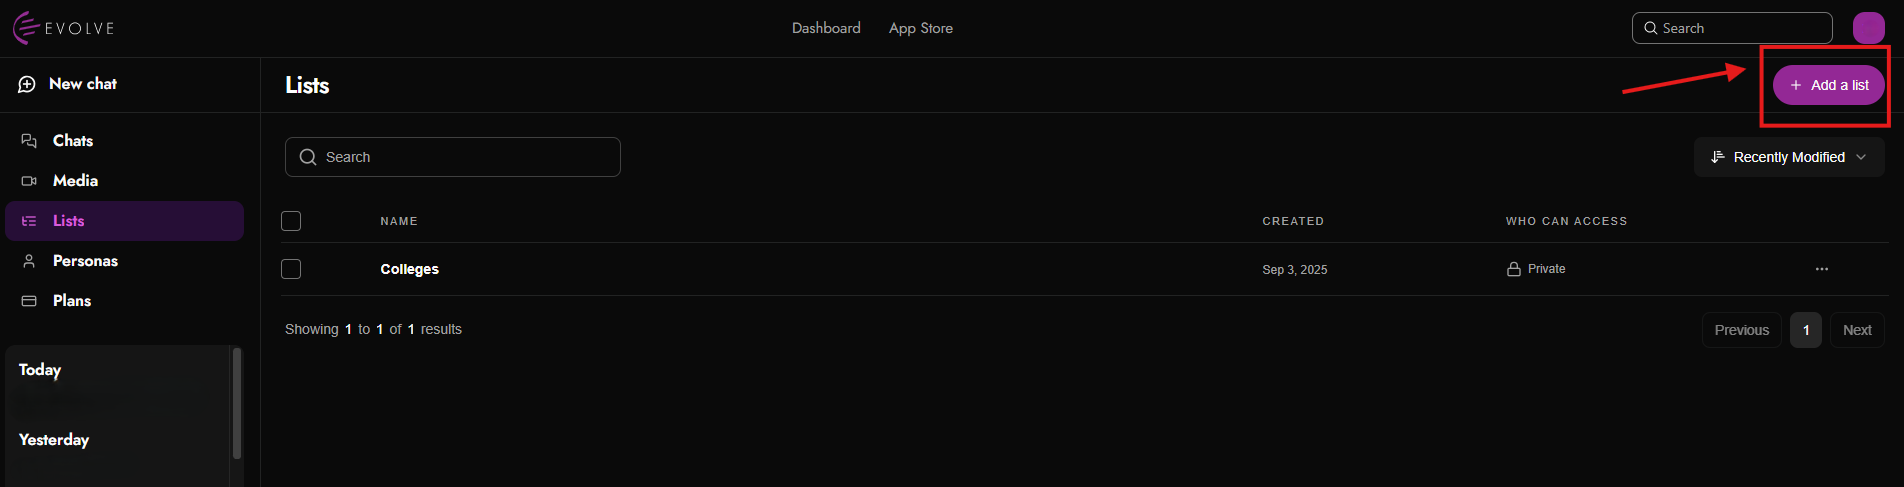
Once in the Lists section, to add a new list click the "Add a list" button at the top right, as depicted in the image above.
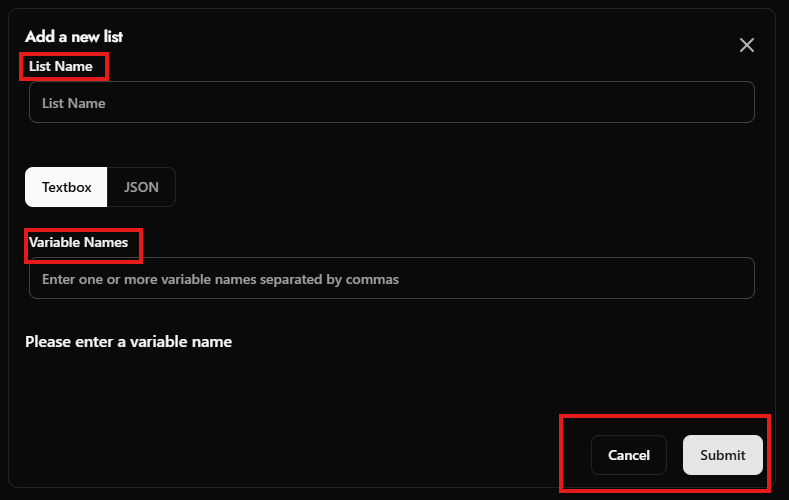
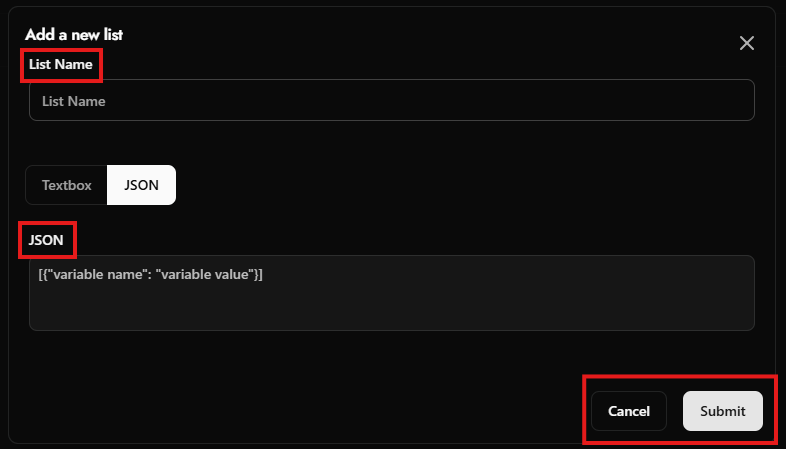
Then, a window will pop up, and you can choose between creating a list using a TEXTBOX or JSON format. You need to enter a List Name and add your variable names in the format provided. After you fill out all the fields, click "Submit" to add the list, or click "Cancel" to discard it. For more specific information about creating a JSON list, you can check out this guide.

Once in the Lists section, you will see a table displaying your lists with columns for "Search”, “Select”, “Name", "Created", "Who can access”, and “Recently Modified”. Use the sort arrows next to each of the three column titles to sort the lists as needed.
You can also search your list using the “Name” field by typing the name of your list.
Then, a window will pop up, and you can choose between creating a list using a TEXTBOX or JSON format. You need to enter a List Name and add your variable names in the format provided. After you fill out all the fields, click "Submit" to add the list, or click "Cancel" to discard it. For more specific information about creating a JSON list, you can check out this guide.
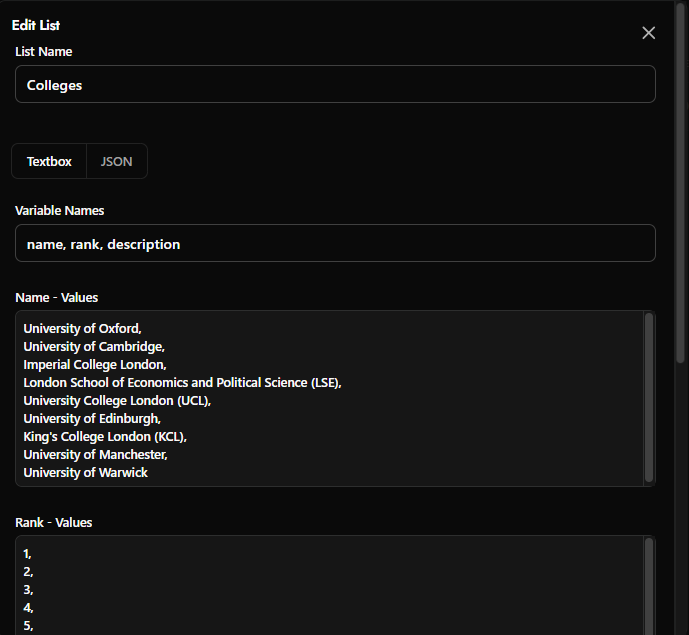
This list appears to contain college data with three variables:
name
rank
description
Each variable has its own values section. The app will likely match values by row position.
For example:
Row | Name | Rank | Description |
1 | University of Oxford | 1 | Description 1 |
2 | University of Cambridge | 2 | Description 2 |
3 | Imperial College London | 3 | Description 3 |
The List Name field currently says:
Colleges
Use this field to rename the list.
Top UK Colleges
Use Textbox if you want to enter values manually in separate fields.
The Variable Names field currently contains:
name, rank, description
These are the fields available for each list item.
The Rank - Values box contains the ranking numbers.
Current visible examples include:
1,
2,
3,
4,
5,
Each rank should correspond to the college name on the same row.
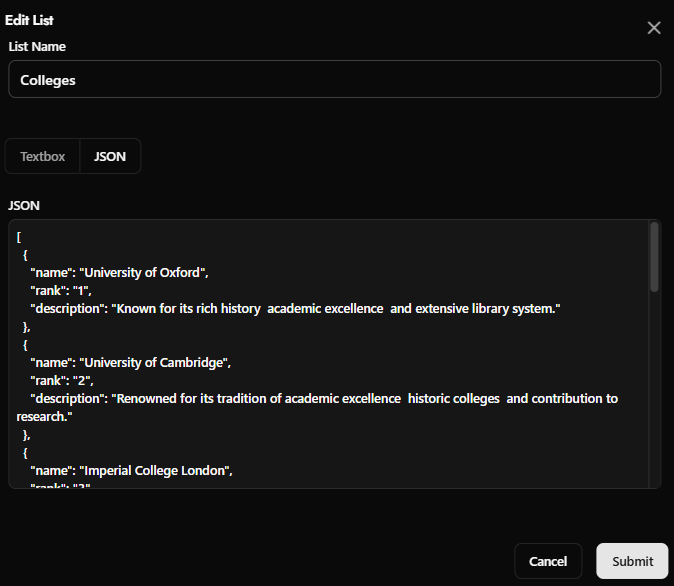
Make sure your JSON follows these rules:
Rule | Correct | Incorrect |
Use square brackets around the full list |
| Missing brackets |
Use curly braces for each item |
| Plain text only |
Put field names in double quotes |
|
|
Put text values in double quotes |
|
|
Separate fields with commas |
| Missing comma |
Separate items with commas |
| Missing comma between objects |
Do not add a comma after the final item |
|
|
To add another college:
Scroll to the bottom of the JSON box.
Find the final object before the closing ].
Add a comma after the final object.
Add the new college object.
Click Submit.
To edit a college, change the value after the field name.
Example:
Create New ListCopy Code
"name": "Imperial College London"
You can change it to:
Create New ListCopy Code
"name": "Imperial College London, UK"
Be careful not to remove the quotation marks.
Find the college object and edit the rank value.
Create New ListCopy Code
"rank": "4"
Change it to:
Create New ListCopy Code
"rank": "5"
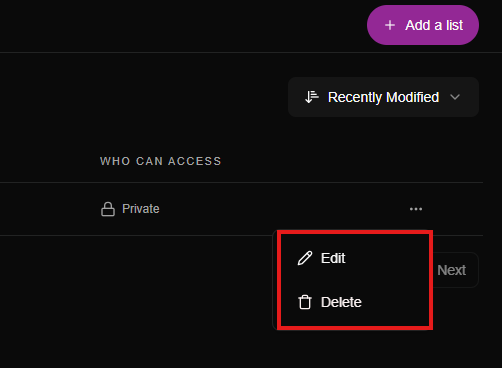
To delete a college:
Select the full object, from { to }.
Remove it.
Fix the commas.
Create New ListCopy Code
[ { "name": "University of Oxford", "rank": "1", "description": "Oxford description." }, { "name": "University of Cambridge", "rank": "2", "description": "Cambridge description." }, { "name": "Imperial College London", "rank": "3", "description": "Imperial description." } ]
If you delete the middle item, the result should be:
Create New ListCopy Code
[ { "name": "University of Oxford", "rank": "1", "description": "Oxford description." }, { "name": "Imperial College London", "rank": "3", "description": "Imperial description." } ]
Incorrect:
Create New ListCopy Code
[ { "name": "University of Oxford", "rank": "1", "description": "Oxford description." } { "name": "University of Cambridge", "rank": "2", "description": "Cambridge description." } ]
Correct:
Create New ListCopy Code
[ { "name": "University of Oxford", "rank": "1", "description": "Oxford description." }, { "name": "University of Cambridge", "rank": "2", "description": "Cambridge description." } ]
Incorrect:
Create New ListCopy Code
{ 'name': 'University of Oxford' }
Correct:
Create New ListCopy Code
{ "name": "University of Oxford" }
Incorrect:
Create New ListCopy Code
[ { "name": "University of Oxford", "rank": "1", "description": "Oxford description." }, ]
Correct:
Create New ListCopy Code
[ { "name": "University of Oxford", "rank": "1", "description": "Oxford description." } ]
When your JSON is valid:
Review the List Name field.
Check that every item has name, rank, and description.
Make sure the JSON starts with [ and ends with ].
Click Submit.