Please begin by following this Link, which will direct you to the sign-in page for Evolve.
If you're unsure how to log in, follow this guide here.
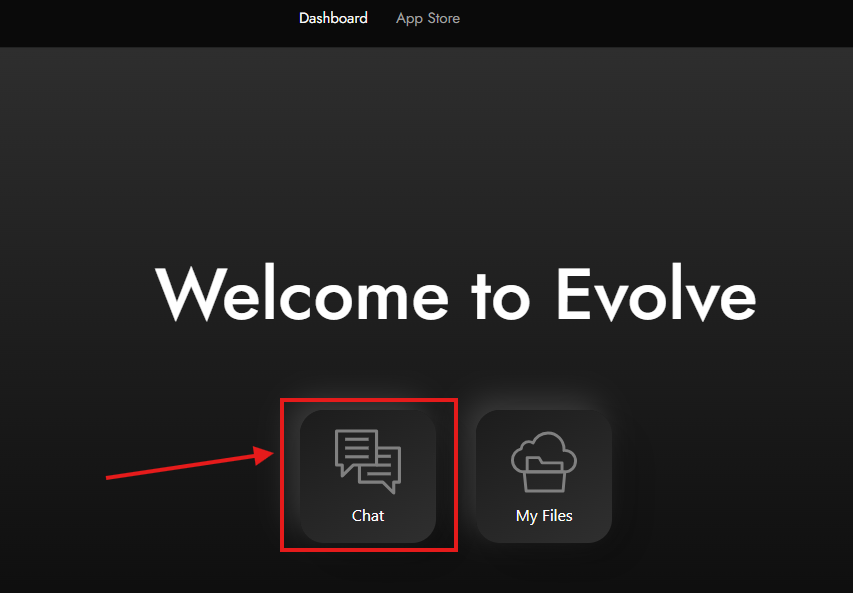
After logging in, navigate to your dashboard. Click on "Chat." If you haven't installed AI Studio yet, you can do so from the App Store.
For guidance on installing apps, refer to this guide.
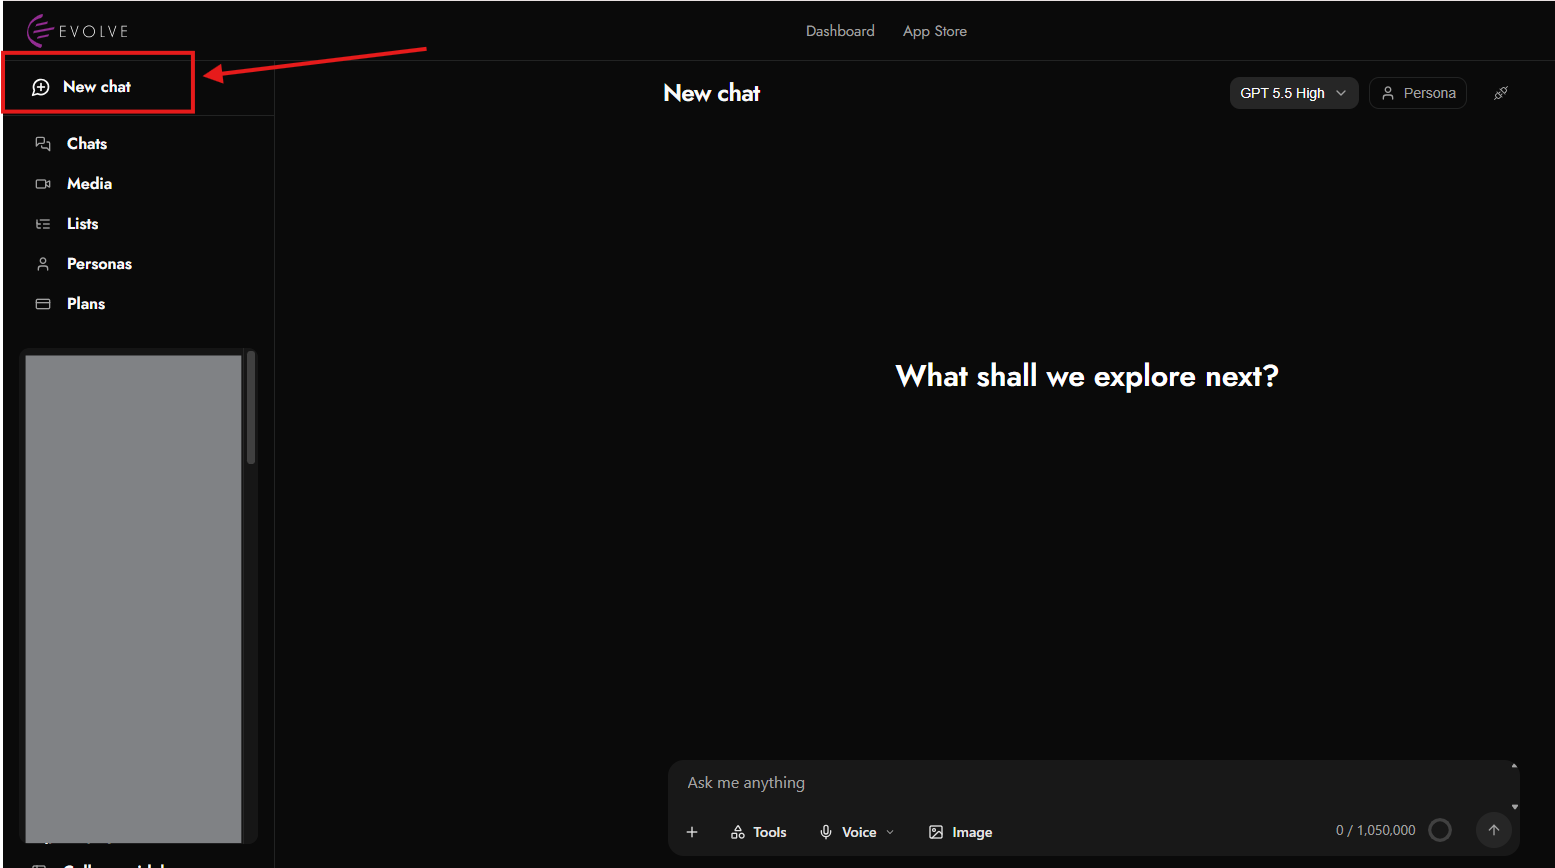

To submit your prompt:
Type your prompt in the message input box.
Click the send arrow to submit your prompt, as depicted in the image above.
The results will be stored and accessible in the Chats section.

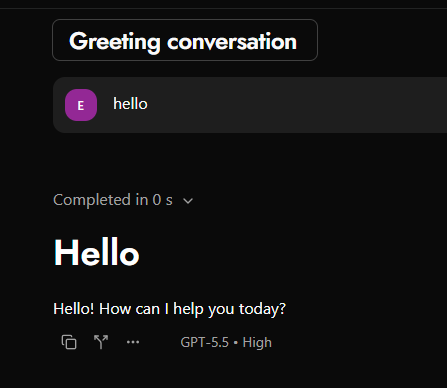
To add a title, click the "Greeting Message" input box, as depicted in the image above, enter a title for your conversation, and click the “✓” icon to save or “x“ to cancel the title for your session.
When you click the “Save” icon, you will see a checkmark confirming the changes:

You will see that it automatically saves the first word of your message:


To edit a prompt:
Find the prompt you want to edit in the conversation history.
Click the "Pencil" button below the prompt.
Make your changes and click the “Submit” button to save, or click the “Cancel” button to cancel, as depicted in the image above.

The toolbar includes various features, such as Model selection and Persona, as depicted in the image above.
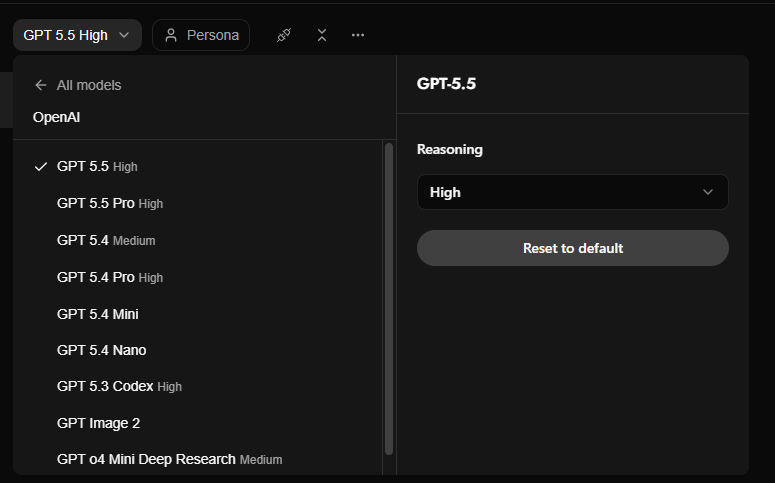
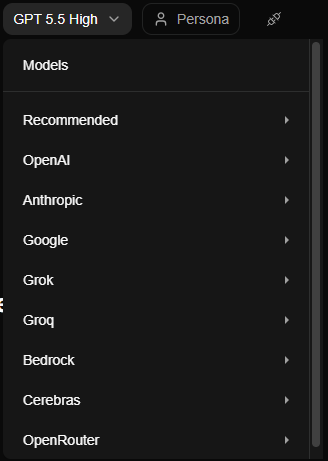
The drop-down menu of all models listed above is shown in the screenshot.
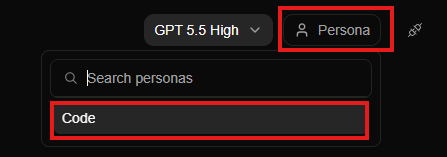
Persona: Click the dropdown menu to add a persona to the conversation.

Click the icon below to connect to the MCP Servers.
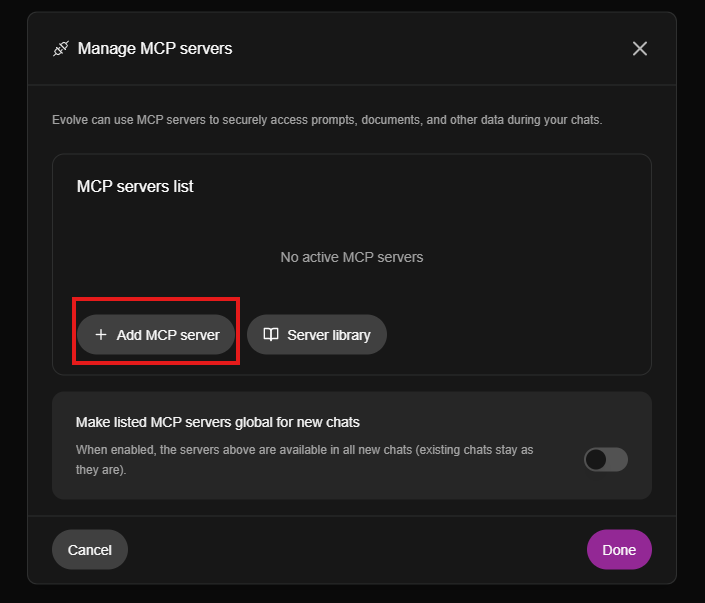
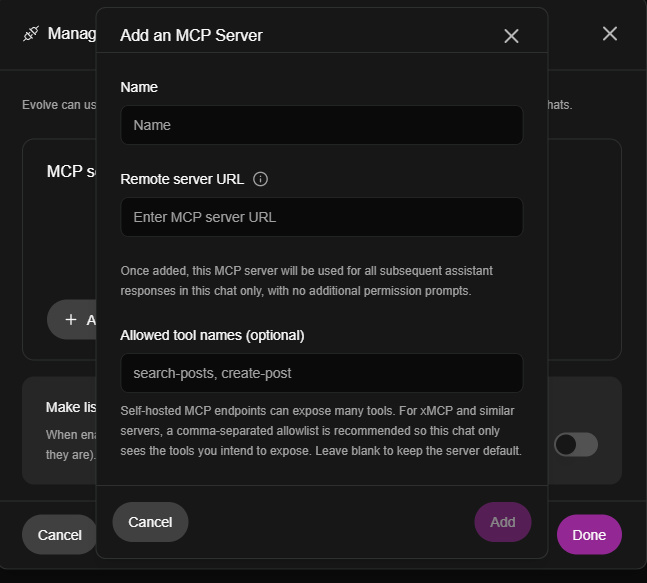
Add new server:
Name: Click on the name to type a name for the server.
Remote server URL: Enter the MCP server URL.
Add: Click the Add button to add the new server.
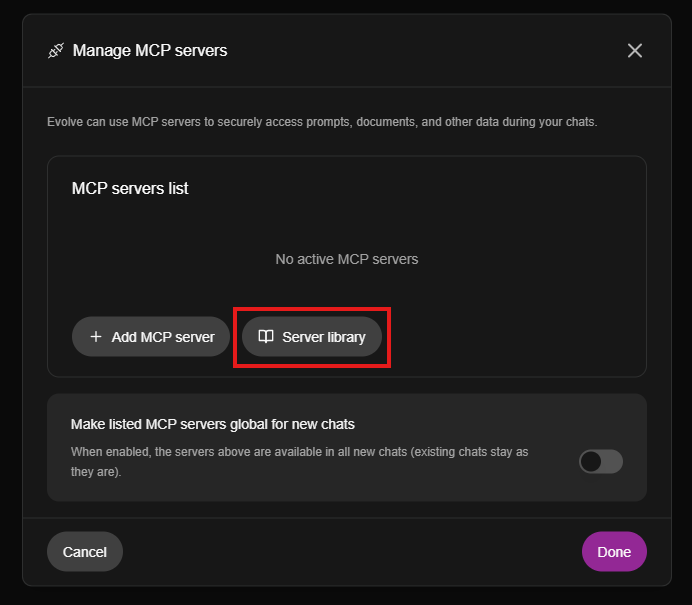
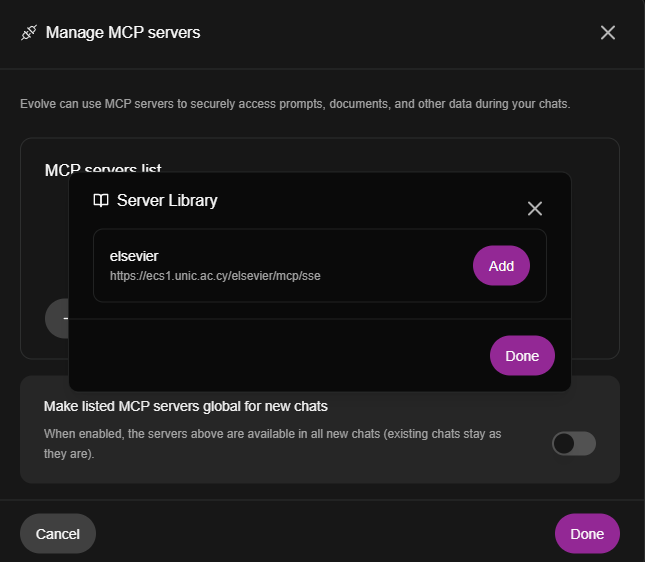
Server library: Click on Server library to view the list of your servers available, then select which one you want and click “Done”.
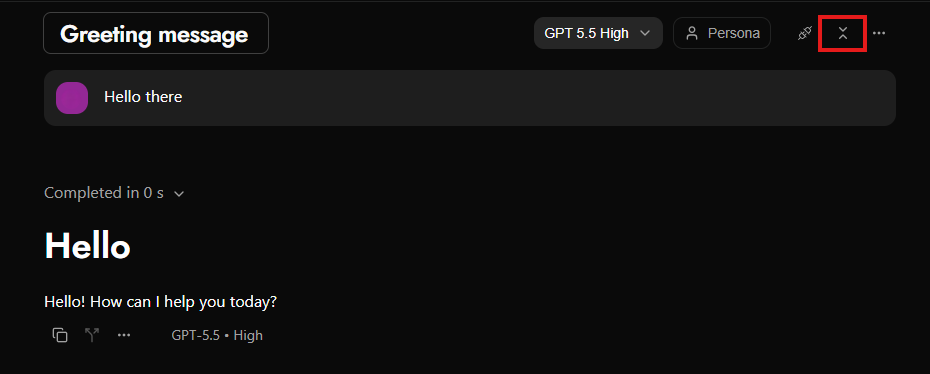
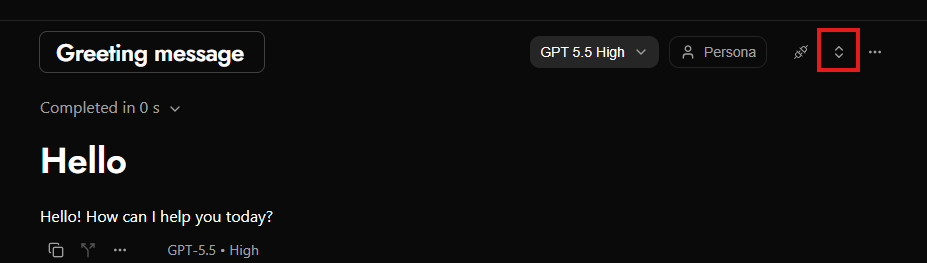
Click on the icon above to hide the prompts.
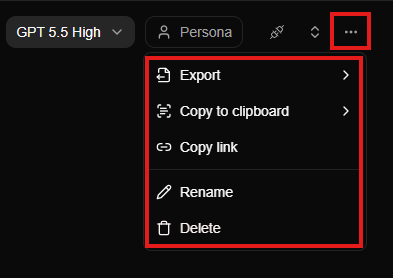
Click on the three dots:
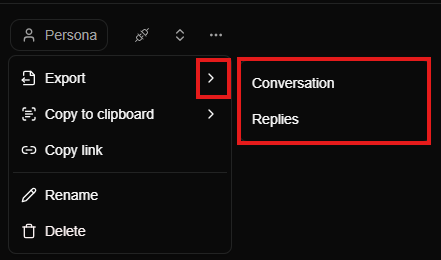
Export: Able to export the conversation link or the replies-only link
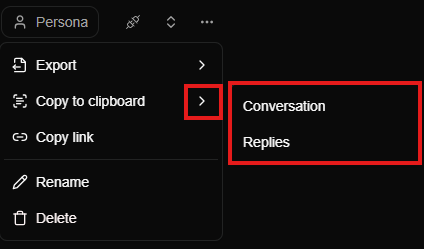
Copy to clipboard: Able to copy the conversation link or the replies-only link
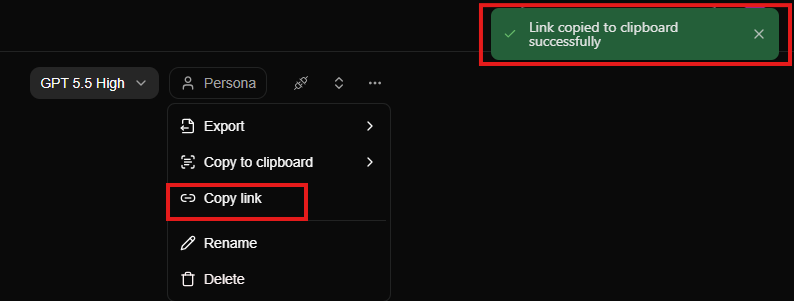
Copy link: Copies the link of the conversation
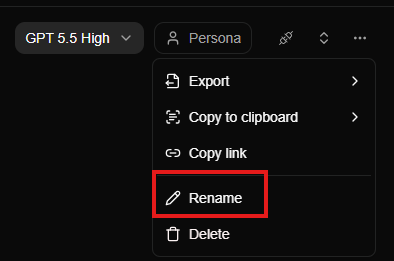
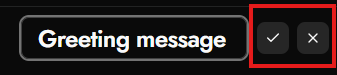
Rename: Renaming the conversation through the title after clicking Rename
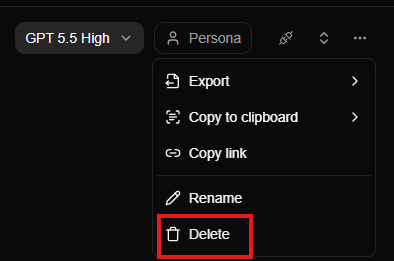
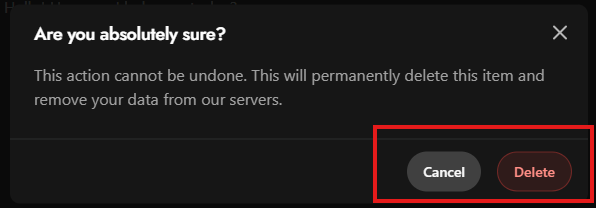
Delete: Deleting the conversation by pressing the delete button.

You can view the current token usage for the conversation alongside the model's maximum context capacity.

To copy a single prompt, click the "Copy" button, as depicted in the image above.

When you click the “Copy” button, you will see a green checkmark and a notification above, which indicates that the prompt was successfully copied to your dashboard.
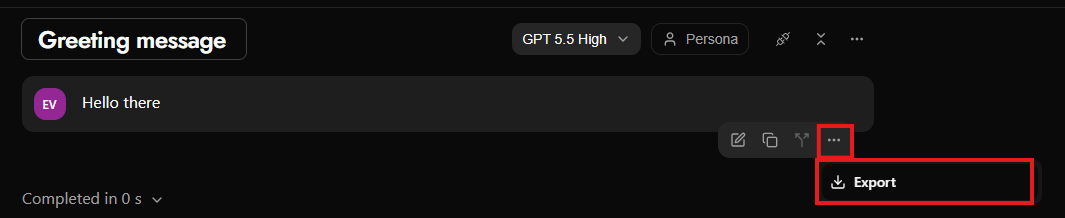
To export a single prompt, click the "Export" button, as depicted in the image above.
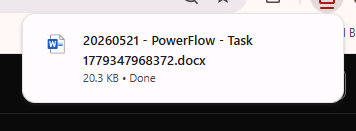
Then, your prompt will be exported as a Word file(.docx format), and you will see it in your Downloads folder on your device.
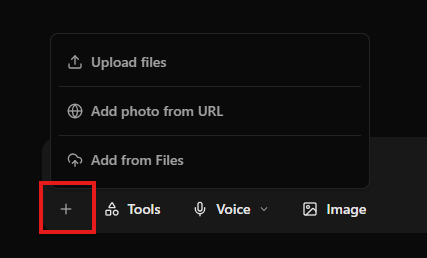
If you press the “+” button, you will see a drop-down menu with four options.
Add photos – Select photos from your device to upload
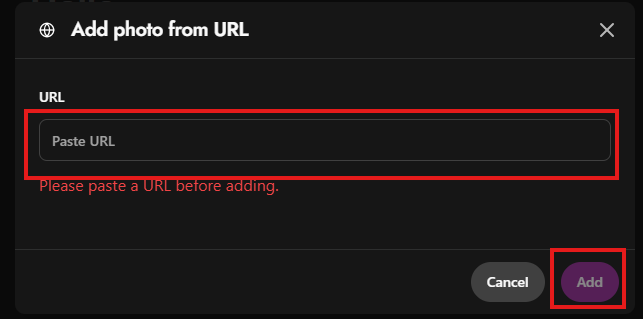
Upload from URL – Insert a URL here and press “Add“
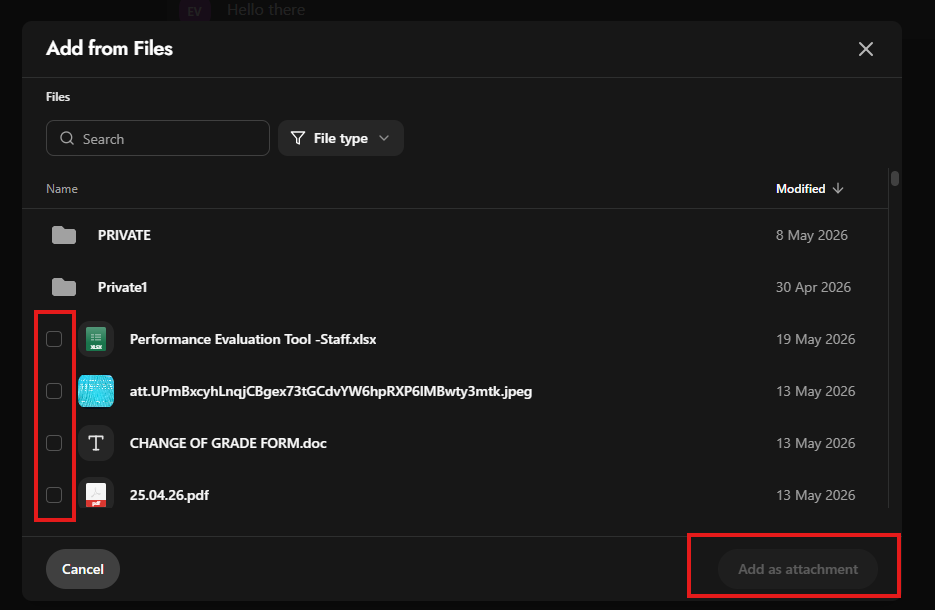
Add from Files – Select the docs you want by check box and press “Add as attachment”.

If you press the “Tools” button, you will see a drop-down menu with an option for "Formatting Options”.

You will see a new bar above your message field where you can format your message in any way you want. You could create links, insert tables, and much more, as depicted in the image above.
To apply Formatting:
Enter your text into the input box.
Select the text you wish to format by highlighting it.
Choose the desired formatting option by clicking on the corresponding icon in the toolbar.
The formatting will be applied to your selected text.
After formatting your message, click the send arrow to submit your formatted message.

Undo icon, to undo something that you did wrong.

Redo icon, to redo something that you want.
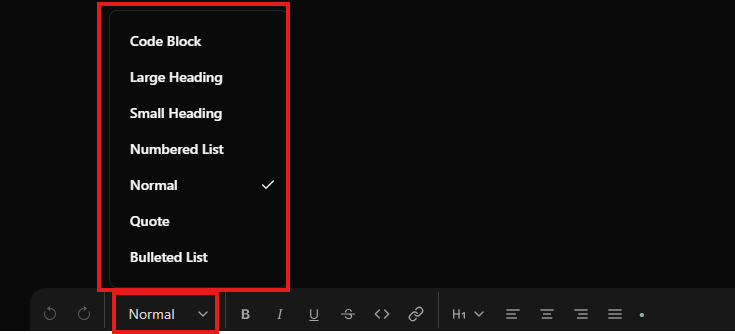
Normal: To change the heading, click the arrow next to Normal, then select the heading you prefer.

Bold (B): To bold text, click the "B" icon, then type your text or highlight existing text and click the "B" icon.

Italic (I): To italicize text, click the "I" icon, then type your text or highlight existing text and click the "I" icon.

Underline (U): To underline text, click the "U" icon, then type your text or highlight existing text and click the "U" icon.

Strikethrough (S): To apply strikethrough, click the "S" icon, then type your text or highlight existing text and click the "S" icon.

Code (<>): To format text as code, click the "<>" icon, then type your code or highlight existing text and click the "<>" icon.

ink (🔗): To insert a hyperlink, click the "🔗" icon, enter the text you want to display, and then the URL. In the example above, the text will become hyperlinked when you insert the link you want.
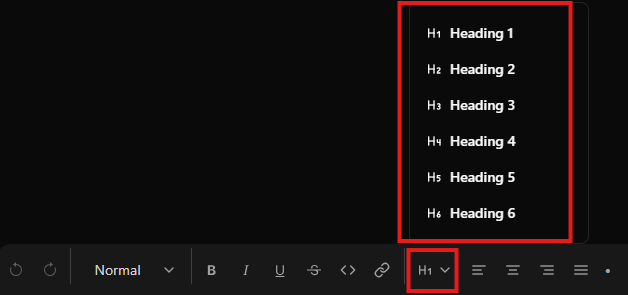
H1: To change a heading, click the arrow next to the "H1" icon, enter the text you want, or select the text and choose which Heading you prefer.

Left alignment: To align the text to start from the left, enter the text you want or select the text and press the button.

Center alignment: To align the text to start from the center, enter the text you want or select the text and press the button.

Right alignment: To align the text to start from the right, enter the text you want or select the text and press the button.

Justify: To align the text to justify, enter the text you want or select the text and press the button.

Generic List (•): To create a generic list, click the "•" icon, then type each item. Press Enter to add a new bullet.